How to Install Privacy Fence Panels

If you want to improve the look and function of your backyard, upgrading your fence is one of the best ways to do that.
If you’re planning (or hoping) to tackle the job yourself, you might be wondering how to install privacy fence panels. Here, we’ve created a relatively easy guide to installing ready-made privacy fence panels. Here’s what you need to know.
1. Check Local Regulations
Before you do anything about installing any kind of fence, you need to check what local regulations say about fence heights, setbacks, and other rules.
The last thing you want is to buy privacy fence panels that are too high and be told you need to take the whole fence down! Always make sure you’re meeting local regulations before you start planning your privacy fence project.
Never assume that your fence can be the maximum height all around your property, either. Many city building departments require fences to step down at various points on the property line.
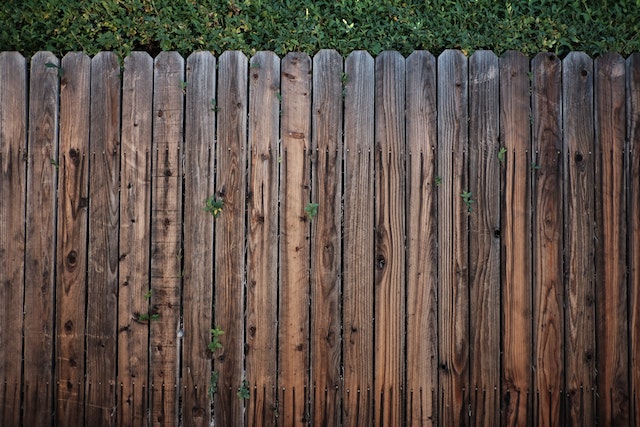
2. Choose Your Fence Panels
The first step in the answer to the question of how to install privacy fence panels is that you need to choose the type of privacy fence panels you want to install.
Different manufacturers and big box hardware stores supply different types of privacy fence panels, including wood privacy fence panels, vinyl privacy fence panels, composite privacy fence panels, and more. You need to know which one you plan to install before you can move on to the next steps.
3. Measure Your Fence Lines
The next step in answering the question of how to install privacy fence panels is to measure your fence lines.
You will first need to determine where your fence line is, which might be done by finding your site boundary pegs or working according to an existing boundary fence. Mark the corners of your fence with bright spray paint to make measuring easier.
Once you know where your fence needs to go, and have marked the corners, ends, and gates of your site, use a measuring wheel or a digital measuring tool to measure each of your fence lines. If you use a digital tool, you will have the added benefit of automatic slope and angle measuring.
Make a sketch of your fence lines, marking all the dimensions, any problems like slopes or obstructions, and the position and size of gates.
4. Do Your Fence Take Off
The next step in installing privacy fence panels is to do your fence takeoff. To do this, you will need to know the size of your fence panels and the size and type of fence posts you’re planning to use. Calculate what the center-to-center spacing of your fence posts needs to be by adding the width of one fence post to the width of one panel.
Once you know the spacing of your privacy fence posts, you can start calculating how much fencing you need for each fence line.
Divide each fence line by the center-to-center spacing of your posts. Round up the figure you get to the nearest full number to get the number of panels for that fence line and round down for the number of line posts.
If you have any sloped sections of your fence line where you will need to step panels, decide whether you are going to do half, quarter, or something else for your panels, and then calculate the panels and posts accordingly.
Next, count all the end, corner, and gate posts you will need, and add them all together.
Adding all of the panels, posts, gates, and other items you will need for your fence installation together will give you your fence takeoff.
5. Clear Your Fence Lines
Before installing a new privacy fence, you need to remove the old one and any obstacles, vegetation, and other items on your fence line.
If you are removing a fence, be sure to pull the fence posts and any concrete footings they may have that will interfere with the installation of your new fence.
It’s usually a good idea to have a waste bin on site when you’re removing an old fence, and don’t forget to read our article about where to dispose of old fence panels!
6. Mark Holes and Dig
Fence posts usually go in before panels, and there’s usually a couple of days between fence post installation and panel installation to allow concrete footings to set properly.
The next step in the answer to the question of how to install privacy fence panels is to mark your holes and dig post holes. Here’s how:
- Run a string line along your site boundary – this is the line that delineates the legal edge of your property, and all of your fence posts will need to be inside that line
- Mark the position of all end, corner, and gate posts
- Using your drawing and take off, divide your fence lines and mark the position of line posts – if your fence lines are short and there is one panel that would be very different to the others, it’s usually a good idea to make all of the panels equal
- Dig your holes – you could use shovels and post hole diggers or an augur, or you could pound your posts if they are a type of post that can be pounded
7. Set Your Posts
The next step in installing your fence is to set your fence posts in the holes you’ve created. Do this by placing your posts in each hole and then mixing or moving ready mixed concrete to the holes, filling up around the posts, and gently tamping the concrete down to remove any trapped air.
Many people also add a layer of gravel under fence posts for drainage, or you could first pour a layer of concrete to prevent water from getting to the posts from below.
Your concrete mixture should be stiff enough to hold your fence posts in position, but if you need to, you can also add temporary bracing to keep posts plumb and level while your concrete is setting.
Some fence installers choose to install their posts a little higher than they need to be and then trim the tops later, but if you are comfortable setting your posts to the right height, you can do that too. It’s all about what works best for you and gives you the best finished result.
You want to make sure that your fence posts have a very small amount of clearance (usually a few millimeters or a fraction of an inch) of extra space between them so that you can slip your panels in. You can use a privacy fence panel or a piece of lumber that is cut to size as a jig to check post spacing as you go.
8. Let Your Concrete Set
As much as you want to get your fence built as quickly as possible, you need to give your fence posts and their concrete bases time to set.
It usually takes a few days for concrete to be properly set, so give it a little time before you start trying to install your privacy fence panels. If you try to hang them too soon, the weight could pull your fence posts out of square and ruin the whole fence.
Also, remember that the ambient temperature is a factor in how long it takes concrete to set. If it’s colder out, you might have to wait longer for your concrete to set. On the other hand, concrete also likes to be damp while it’s curing, so if it’s very hot, you might need to wet your concrete from time to time to ensure it hardens properly.
Speak to your concrete supplier to get the best tips for your area.
9. Install Your Privacy Fence Panels
The last step in the process of how to install privacy fence panels is the most important one: installing the panels.
There are many ways to install privacy fence panels, and again, here, you want to refer to the manufacturer or supplier. They will probably have a list of hardware and fittings you can use, and there might be more than one option.
Make sure you have a builder’s level while you’re installing your fence panels, so you can make sure that they are square when you install them and have at least one person helping who can hold the panels in place while you fasten them.
If you need to cut panels to fit shorter spaces or for stepped areas of your fence, always follow the carpenter’s golden rule: measure twice, cut once! You can’t add more panels if you cut them too short.
Cheaper, But You Will Need Tools and Equipment
Choosing to install a privacy fence yourself might save you a little money, but you will still need some specialized tools to get the job done, and what you save in money, you will spend in time.
Installing a privacy fence is possible for most people who are relatively handy, but if you’re just not, it’s always a better idea to hire a professional. If you’re not looking to hire a fence company, individual fence installers in your area might offer labor-only services, so you can save a little on fence materials.
Just remember that when you DIY your fence or hire a solo installer, you won’t get a workmanship warranty, so that’s another factor in the decision-making process.
