How to Stain a Fence Step by Step

It’s that time of year again. You’re sitting in your backyard, enjoying a cold drink, when suddenly you realize that your fence has seen better days.
It’s not that it’s broken. It’s more that it looks… tired. Staining your fence is a quick and easy way to refresh it and extend its life. Here’s what you need to know.
Why Do You Need to Stain Your Fence?
Before we get into the steps you’ll need to take and explain how to stain a fence, you first need to know why you need to do it.
First, staining your fence will make your fence look better. Once old stain starts flaking off, your fence is going to look like it’s got a bad case of sunburn, and that’s not too far from the truth!
Second, stain protects your fence from the elements, and when it’s flaking off, it can’t do that effectively.
So, the answer to the question of why you need to stain your fence is that it makes it look better and last longer.
How Does Fence Stain Protect Your Fence?
Since fences are usually outside, they’re exposed to the elements all day, every day. Sun, wind, and rain weather eventually destroy wood over time.
Fence stain provides a barrier on your wood fence’s surface, making it harder for the weather to affect the wood.
That’s also why you need to keep the stain on your fence in good shape. Once it starts wearing off, it can’t do this very important job as easily.
How to Calculate How Much Fence Stain You Will Need
Calculating how much fence stain you will need is relatively simple. First, you need to calculate the total area that you need to stain. Then you divide that by the coverage of the stain you’re using.
If you aren’t too sure how to do that, you can also use our easy online fence stain calculator.
Step By Step Guide to Staining a Wood Fence
Now that you know why you need to stain your fence, what fence stain does and how to calculate how much you need, let’s get to the answer to the question of how to stain a fence, and the steps you’ll need to take.
1. Buy Fence Stain
The first thing you will want to do to prepare for staining your fence is to buy the fence stain you will be using. It’s important that you choose the right kind of stain that is made for fences and that it’s a high-quality exterior stain product.
Good quality fence stain will cost a little more, but it will also last longer and protect your fence better, so it’s definitely worth the investment.
2. Gather Your Fence Staining Equipment
Once you have your stain, you will also need some fence-staining equipment. If you regularly do DIY painting jobs, you might already have some of these items:
- A pressure washer – this really does make taking old, flaky fence stains off much easier!
- Scrapers and wire brushes to take the old paint off wherever the power washer didn’t
- Drop clothes to protect plants, paths, and other features in your yard that you DON’T want to be stained!
- Paint trays and brushes or rollers – most fence stain cans will tell you what the best application method is, but it’s always good to have both brushes and rollers on hand because they work better in certain areas
- Solvent and a safe container for brushes and rollers – depending on what kind of stain you use, you will need a different solvent to clean equipment, this could be water, thinners, or turpentine, and you can find out which one by reading the instructions on the stain can
- Old clothes – staining a fence is a messy business! Protect your clothes!
- A step ladder – if your fence is tall or you are short (or both), you will want a ladder so you aren’t trying to paint above your head
Once you’ve gathered all of these things together, you’re ready to move on to the next step.
3. Choose the Right Fence Staining Day
Staining your fence is a long process, but it’s also something that will continue for a few hours after you make the last brushstroke.
That’s because fence stain takes time to dry, and during that time, you want to avoid any extreme weather. Rain can damage freshly applied stains and wash them off. Wind could blow dust and other debris onto the tacky fence stain.
The ideal day for fence staining is overcast but not rainy and with little to no wind. So watch the weather forecast, and choose your day accordingly!
4. Pressure Wash Your Fence
You might be tempted to try to remove old stains from your fence by hand. Don’t. It will take much longer, and you’ll be tired before you even start staining.
A pressure washer is the perfect piece of equipment to remove old fence stains from your fence, and they are relatively inexpensive to buy. You might even be able to rent one from a hardware store or tool hire company.
Once you’ve pressure washed the fence on both sides (assuming you’re staining both sides) follow up with a scraper or wire brush to remove any stubborn flakes of stain.
You don’t have to remove every last piece of fence stain from your fence during this process. It can probably stay if it’s still well attached to the wood and flat. But you do want to remove all the flaky, curled-up bits that will stick up and ruin the finish of your new stain.
5. Prepare the Area
Next, and before you start staining, prepare the area where you will be working. Move anything that can be moved out of the way, and cover anything that can’t with drop cloths or similar.
It takes a little more time to prepare the work area before you stain your fence, but it will save you a lot of time, energy, and money trying to clean stain off places you don’t want it.
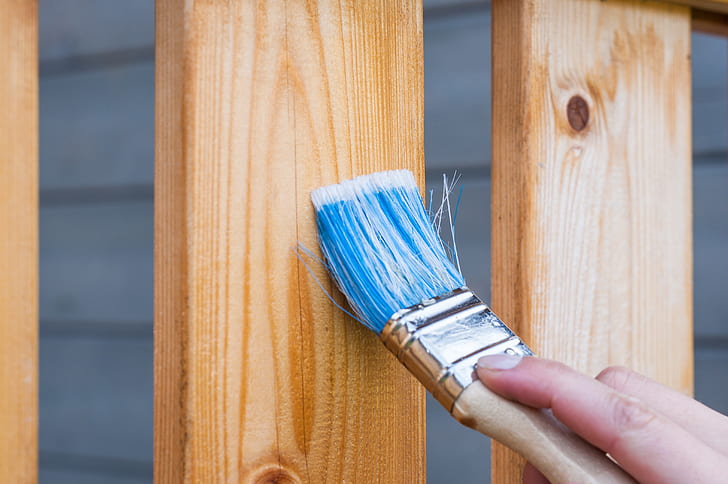
6. Stain the Fence
Once you’ve got your fence prepped, it’s had time to dry, and you’ve got the area around your fence ready for staining, it’s time to get the job done!
Make sure that you mix your stain well when you open the can and before you refill your paint trays. Fence stain can separate when it stands, which might affect your color and coverage.
Pour a little stain into your trays at a time, and use smooth, even strokes to apply it to the fence.
Don’t be tempted to apply your stain too thick. That almost always leads to drips and uneven spots, which will ruin the final appearance of your fence. It’s always better to apply two thin coats than one thick one!
Work panel by panel, and make sure you get into all the nooks and crannies.
Professional Fence Staining Services
Now that you’ve reached the end of this guide to how to stain a fence, you can probably see that it’s not a particularly difficult one, but it does take some time, cost some money, and requires a little skill.
If you don’t have the time or the inclination to invest in a project like staining your fence, there is good news: professionals offer this service, and you can hire a company to stain your fence for you.
Sometimes, fence companies offer this service, but many don’t, so it’s usually best to search for fence staining companies rather than fence companies when you are shopping for this service.
Regardless of whether you do it or someone else, staining your fence is an investment you should make at least every few years.
If you don’t like staining your fence (or paying someone to do it for you), you could replace it with something that does not require maintenance, like a composite fence, vinyl fence, or even a chain link fence with slats.
If you have a wood fence that has been stained in the past, then re-staining your fence will be a fact of life for as long as the fence exists.
